本文將詳細(xì)介紹在 CentOS 7 操作系統(tǒng)上,如何搭建一個(gè)基于 FastDFS 分布式文件存儲(chǔ)系統(tǒng),并整合 Nginx 模塊以實(shí)現(xiàn)高性能、高可用的外網(wǎng)圖片及文件服務(wù)器。該方案適用于需要存儲(chǔ)和快速訪問(wèn)大量靜態(tài)資源(如圖片、文檔、視頻片段)的 Web 應(yīng)用或移動(dòng)應(yīng)用后端服務(wù)。
一、環(huán)境準(zhǔn)備與基礎(chǔ)軟件安裝
- 系統(tǒng)與網(wǎng)絡(luò)要求
- 一臺(tái)或多臺(tái)運(yùn)行 CentOS 7 的服務(wù)器(最低配置1核2G,生產(chǎn)環(huán)境建議更高)。
- 所有服務(wù)器間網(wǎng)絡(luò)互通,并確保防火墻(firewalld)或安全組規(guī)則開(kāi)放后續(xù)所需的端口(如 22122, 23000, 80, 8888 等)。
- 擁有 root 或 sudo 權(quán)限。
- 建議配置靜態(tài) IP 或可解析的主機(jī)名。
2. 安裝基礎(chǔ)依賴(lài)
`bash
yum install -y gcc gcc-c++ make automake autoconf libtool pcre pcre-devel zlib zlib-devel openssl-devel wget vim git
`
- 下載必要組件
- FastDFS:核心存儲(chǔ)系統(tǒng)。
- libfastcommon:FastDFS 依賴(lài)的公共函數(shù)庫(kù)。
- fastdfs-nginx-module:使 Nginx 能夠直接訪問(wèn) FastDFS 存儲(chǔ)文件的擴(kuò)展模塊。
* Nginx:高性能 Web 服務(wù)器,用于提供 HTTP 訪問(wèn)和負(fù)載均衡。
`bash
cd /usr/local/src
wget https://github.com/happyfish100/libfastcommon/archive/master.zip -O libfastcommon.zip
wget https://github.com/happyfish100/fastdfs/archive/master.zip -O fastdfs.zip
wget https://github.com/happyfish100/fastdfs-nginx-module/archive/master.zip -O fastdfs-nginx-module.zip
wget http://nginx.org/download/nginx-1.20.1.tar.gz
unzip libfastcommon.zip
unzip fastdfs.zip
unzip fastdfs-nginx-module.zip
tar -zxvf nginx-1.20.1.tar.gz
`
二、安裝與配置 FastDFS
1. 安裝 libfastcommon
`bash
cd /usr/local/src/libfastcommon-master
./make.sh && ./make.sh install
`
2. 安裝 FastDFS
`bash
cd /usr/local/src/fastdfs-master
./make.sh && ./make.sh install
# 安裝后,配置文件在 /etc/fdfs/,可執(zhí)行文件在 /usr/bin/,默認(rèn)數(shù)據(jù)存儲(chǔ)路徑在 /home/yuqing/fastdfs/
`
3. 配置 Tracker Server(跟蹤服務(wù)器,建議至少一臺(tái))
`bash
cd /etc/fdfs
cp tracker.conf.sample tracker.conf
vim tracker.conf
`
主要修改項(xiàng):
`ini
basepath=/data/fastdfs/tracker # Tracker 數(shù)據(jù)和日志存放路徑
bindaddr=0.0.0.0 # 允許所有 IP 連接,或指定服務(wù)器內(nèi)網(wǎng) IP
port=22122 # Tracker 服務(wù)端口(需開(kāi)放)
http.serverport=8080 # 可選,Tracker 內(nèi)置的 HTTP 服務(wù)端口
`
創(chuàng)建目錄并啟動(dòng)服務(wù):
`bash
mkdir -p /data/fastdfs/tracker
/usr/bin/fdfstrackerd /etc/fdfs/tracker.conf start
# 設(shè)置開(kāi)機(jī)自啟
echo "/usr/bin/fdfs_trackerd /etc/fdfs/tracker.conf start" >> /etc/rc.local
chmod +x /etc/rc.d/rc.local
`
4. 配置 Storage Server(存儲(chǔ)服務(wù)器,建議至少兩臺(tái))
`bash
cd /etc/fdfs
cp storage.conf.sample storage.conf
vim storage.conf
`
主要修改項(xiàng):
`ini
groupname=group1 # 組名,多臺(tái) Storage 可同組
basepath=/data/fastdfs/storage # Storage 數(shù)據(jù)和日志存放路徑
storepath0=/data/fastdfs/storage/files # 實(shí)際文件存儲(chǔ)路徑,可配置多個(gè)
trackerserver=
bindaddr=0.0.0.0 # 或指定服務(wù)器內(nèi)網(wǎng) IP
port=23000 # Storage 服務(wù)端口(需開(kāi)放)
http.serverport=8888 # Storage 內(nèi)置 HTTP 服務(wù)端口(通常由 Nginx 替代)
`
創(chuàng)建目錄并啟動(dòng)服務(wù):
`bash
mkdir -p /data/fastdfs/storage /data/fastdfs/storage/files
/usr/bin/fdfsstoraged /etc/fdfs/storage.conf start
echo "/usr/bin/fdfsstoraged /etc/fdfs/storage.conf start" >> /etc/rc.local
`
在 Tracker 服務(wù)器上檢查 Storage 是否注冊(cè)成功:
`bash
/usr/bin/fdfs_monitor /etc/fdfs/client.conf
`
三、安裝與配置 Nginx 整合 FastDFS
1. 編譯安裝帶 fastdfs-nginx-module 的 Nginx
`bash
cd /usr/local/src/nginx-1.20.1
./configure --prefix=/usr/local/nginx \
--add-module=/usr/local/src/fastdfs-nginx-module-master/src \
--with-httpsslmodule \
--with-httpstubstatus_module
make && make install
`
2. 配置 fastdfs-nginx-module
`bash
cp /usr/local/src/fastdfs-nginx-module-master/src/modfastdfs.conf /etc/fdfs/
vim /etc/fdfs/modfastdfs.conf
`
主要修改項(xiàng):
`ini
trackerserver=
url
storepath0=/data/fastdfs/storage/files # 與 storage.conf 中的一致
groupname=group1 # 組名
`
3. 配置 Nginx 以支持文件訪問(wèn)
在 Storage 服務(wù)器上,編輯 Nginx 配置文件:
`bash
vim /usr/local/nginx/conf/nginx.conf
`
在 http { 塊內(nèi)添加一個(gè) server 配置:
`nginx
server {
listen 80; # 或指定其他端口,需確保外網(wǎng)可訪問(wèn)
servername yourdomain.com或服務(wù)器公網(wǎng)IP; # 你的域名或公網(wǎng)IP
location ~ /group[0-9]/ { # 匹配 FastDFS 文件路徑
ngxfastdfsmodule; # 調(diào)用 fastdfs-nginx-module
}
可選:配置一個(gè)簡(jiǎn)單的狀態(tài)頁(yè)或健康檢查
location /status {
stubstatus on;
accesslog off;
allow 127.0.0.1;
deny all;
}
error_page 500 502 503 504 /50x.html;
location = /50x.html {
root html;
}
}
`
4. 啟動(dòng) Nginx 服務(wù)
`bash
/usr/local/nginx/sbin/nginx
# 設(shè)置開(kāi)機(jī)自啟(可創(chuàng)建 systemd 服務(wù)文件)
echo "/usr/local/nginx/sbin/nginx" >> /etc/rc.local
`
四、測(cè)試與使用
1. 客戶(hù)端測(cè)試上傳
在任意一臺(tái)服務(wù)器上配置客戶(hù)端并測(cè)試:
`bash
cd /etc/fdfs
cp client.conf.sample client.conf
vim client.conf
# 修改 basepath 和 trackerserver
測(cè)試上傳:`
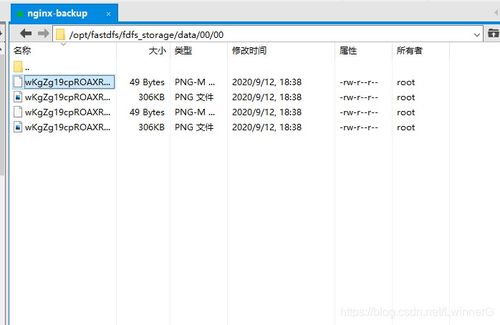
2. 通過(guò)外網(wǎng) HTTP 訪問(wèn)文件
使用上一步返回的文件 ID,構(gòu)造 URL 通過(guò)瀏覽器或 curl 訪問(wèn):
`
http://your_domain.com或服務(wù)器公網(wǎng)IP/group1/M00/00/00/wKgKZF9rT2aANzRsAAAADvC6VUc.txt
`
如果配置了域名,應(yīng)確保域名 DNS 解析到 Storage 服務(wù)器的公網(wǎng) IP,并且服務(wù)器防火墻/安全組開(kāi)放了 80 端口。
五、進(jìn)階配置與優(yōu)化建議
- 高可用與負(fù)載均衡
- Tracker 集群:部署多個(gè) Tracker,并在
storage.conf和client.conf中配置所有tracker_server。
- Storage 集群與分組:部署多個(gè) Storage 服務(wù)器到同一組(group)實(shí)現(xiàn)冗余,或配置不同組(如 group1, group2)進(jìn)行容量擴(kuò)展。
- Nginx 負(fù)載均衡:在 Storage 服務(wù)器前再部署一層 Nginx 作為負(fù)載均衡器,將請(qǐng)求分發(fā)到多個(gè) Storage 的 Nginx 服務(wù)上。
- 安全性
- 使用防火墻限制除必要端口(80, 22122, 23000)外的所有訪問(wèn)。
- 考慮為 Nginx 配置 SSL/TLS(HTTPS)以加密傳輸。
- 可以在 Nginx 層面配置訪問(wèn)令牌、Referer 防盜鏈等。
- 性能與存儲(chǔ)
- 將
store_path0指向高性能存儲(chǔ)介質(zhì)(如 SSD)。
- 調(diào)整 Linux 內(nèi)核參數(shù)(如文件描述符數(shù)量、網(wǎng)絡(luò)參數(shù))。
- 根據(jù)訪問(wèn)模式,合理配置 Nginx 緩存。
六、應(yīng)用軟件服務(wù)集成
在您的應(yīng)用程序(如 Java Spring Boot、Python Django、PHP 等)中集成 FastDFS 客戶(hù)端:
- 引入客戶(hù)端 SDK:根據(jù)編程語(yǔ)言選擇官方或社區(qū)維護(hù)的 FastDFS 客戶(hù)端庫(kù)。
- 配置客戶(hù)端:在應(yīng)用配置文件中指定 Tracker 服務(wù)器地址列表。
- 文件操作:
- 上傳:調(diào)用客戶(hù)端 API 上傳文件,獲得文件 ID(如
group1/M00/00/00/xxx.jpg)。
- 存儲(chǔ):將文件 ID 存入您的業(yè)務(wù)數(shù)據(jù)庫(kù)。
- 訪問(wèn)/下載:通過(guò)拼接
http://你的Nginx域名或IP/+文件ID生成完整的可訪問(wèn) URL,前端直接使用此 URL 展示圖片或提供下載鏈接。
- 刪除:通過(guò)客戶(hù)端 API 根據(jù)文件 ID 刪除文件(注意權(quán)限控制)。
通過(guò)以上步驟,您就成功搭建了一個(gè)外網(wǎng)可訪問(wèn)、具備基本高可用能力的 FastDFS + Nginx 圖片/文件服務(wù)器,并可以將其集成到您的應(yīng)用軟件服務(wù)中,高效管理海量靜態(tài)資源。